Monday, April 11, 2011

Advantages of Bar Ends

Bar ends were popular on mountain bikes from the mid 1990’s to early 2000’s but fell out of fashion due to the influx of riser bars in  North American. The falling of fashion was caused by poorly designed full suspension mountain bikes which forced riders to peddle in the saddle or suffer power robbing suspension bob (bio pacing) or disc (drive train induced shock compression). By and large this problem has now been over come by a combination of technologies such as platform rear suspension shocks and anti squat suspension designs which  allow a cyclist to attack out of the saddle without loosing pedal efficiency.

Here are the advantges of Bar Ends:

1)Reduced hand fatigue- Bar ends give you an extra hand position which takes pressure of your ulner nerve which helps reduce hand numbness and reduces the likelihood of suffering handlebar palsy and carpal tunnel syndrome injury. (Note: It is difficult to pedal, shift, and brake with a numb palm and fingers.)

2)Reduced Agriculture- Depending on the design of the bar end they can protect your hands from trees, thorn bushes, prickly cactuses and shrubs.

3)Crash Protection- Bar ends help can prevent your brake levers, shifters and handle bars from suffering crash damaged by taking the abuse of a crash.

4)Sobering up the drunken monkey- Bar ends reduce the affect of gyroscopic precession also know as wheel wobble during step grade climbs. This allows the rider to maintain a straighter line up hill increased ability to navigate around momentum killing obstacles by moving your center of gravity forward weighing the front wheel improving bike handling and maneuverability.

5)Faster sprinting- Bar ends allow for more powerful sprinting by letting you use your arms and core muscles to put the bike side to side putting power more power into the pedals.

6)Improved Lactic Threshold- Bar ends open up your lungs for superior respiration during riding which reduces lactic acid build in your muscles which allows you to work harder before fatigue sets in.

7)Improved Cycling Performance- The over all effect of bar ends is faster start line acceleration, faster climbing ability, faster sprints, better respiration which means higher rider watt out put which equals higher averages speeds which results in quicker race times.

8)Tree Leaning- on steep technical climbs by applying the brakes and leaning one bar end against a tree trunk or other solid object you can clip both feet into the pedals before beginning the climb.

9)Easier Bicycle Mounting- bar ends allow for smoother mounting and dismounting of your bike on the fly.

10)Reduced Body Fatigue- bar ends provide alternate riding position to reduce tiredness and repetitive injury in body areas such as back, neck and shoulders.

11)Improved Aerodynamics- bar ends allowed for a flat back more aerodynamic position for long descents.

12)Finger Protection- inward canted bar ends protect your outer fingers from contact with trees and other trail side obstacles. In the case where a in ward canted bar end does get brushed by a tree it will hopefully glance off.

13)Collarbone Protection– inward canted bar ends allows for the bar end to glance of trees instead of the end of the handle bar being turned into the tree followed painfully by the riders body.

14)Helmet Hanger- bar ends provide a convenient place to hang your helmet and hydration pack while your off the bike checking out the sites.


My favorite bar ends:

Easton EC90
Weight 80 grams
Length 110 mm
Material Carbon Fiber


Titec Pluto Carbon Bar Ends
Weight 110 grams
Length 110
Material Carbon Fiber


Extralite Cyberends
Weight 38 grams
Length 100 mm
Material 7075 aluminum


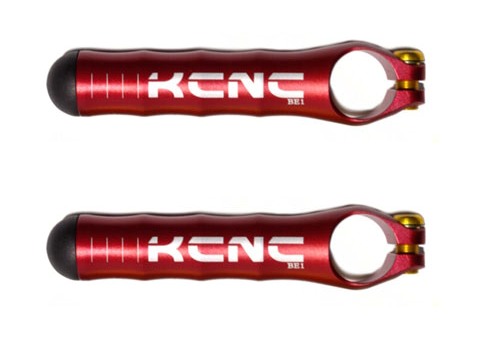
KCNC BE1 MTB Bar Ends
Weight 51 grams
Length 115 mm
Material 7075 aluminum


(Picture not show)


Saturday, April 2, 2011

Favorite Bicycle Cleaning Tools

MEC Chain Cleaner


Shimano HypoSpitt Oiler


Blue Dawn Dish Soap


Finish Line Wet Chain Lube

Friday, April 1, 2011

Special Cleaning and Lubrication, Part 2

The Saddle

Most of the time I will just damp rag the top leather portion of the saddle with a clean rag. For the bottom side I use a soapy rag because the bottom of the saddle usually collects more mud and dust from the rear tire. So give it the old soapy rag, rinse rag, dry rag treatment.

After the saddle is dry you can apply a bit of ArmorAll to a clean rag and apply it strategically to the "sides" of saddle. I say strategically because too much ArmorAll in the wrong place will make the saddle very slippery and have you slip sliding all over the saddle on your next ride.

But applied in just the right amount in the right locations on the saddle ArmorAll will reduce pedaling saddle friction and help prevent saddle sores. Also since ArmorAll is a plastic protectant so it should help prolong the life of the saddle by preventing it from cracking and fading from moisture exposure.

According to Tour de France team Radio Shack chief bicycle mechanic Vince Gee this is this also the preferred method for removing the "Benjamin's" from a certain pro athletes favorite saddle. Vince also recommended using latex gloves during the procedure.

Special Cleaning and Lubrication, Part 1

The Seat Post

Of all the repairs bicycle mechanics do the frozen seat post is the one they "hate" the most. It has been know to write off the occasional bicycle frame and the odd mechanic. Which, given the price of bicycle frames these days you really don't want to avoid.

So, depending on how much moisture your bicycle sees you will want to occasionally remove your seat post and give it a "clean and gel".

Remove the post and damp rag it with a clean damp cloth to ensure the seat post is clean. Wipe the post dry with a clean rag.

In the next step step we will apply Finish Line "Fiber Grip" (Carbon Fiber Assembly Gel) to the portion of the seat post that gets inserted into the frame. This anti-galvanic Gel prevents corrosion between the seat post and the carbon seat tube and keeps the seat post from slipping by incorporating little plastic grit particles in the gel. The plastic particles safely increase the coefficient of friction between the seat post and the seat tube and prevent the seat post from slipping. Once the seat post as been treated with the assembly gel you can re-insert it back into the frame and adjust as per normal. Wipe of any excess Fiber Grip from the post so the post doesn't collect dust will riding. Fiber grip also works great for aluminum frames and the occasional slipping seat post as well.

Tip 1: If you think you have some moisture in the seat tube you can wick it dry by inserting a clean rag into the seat tube and tipping the bicycle up side down and giving it a bit of a shake.

Tip 2: If it is a full suspension bike "do not" tip it upside down as some suspension forks and disk brakes don't like being tipped upside down.